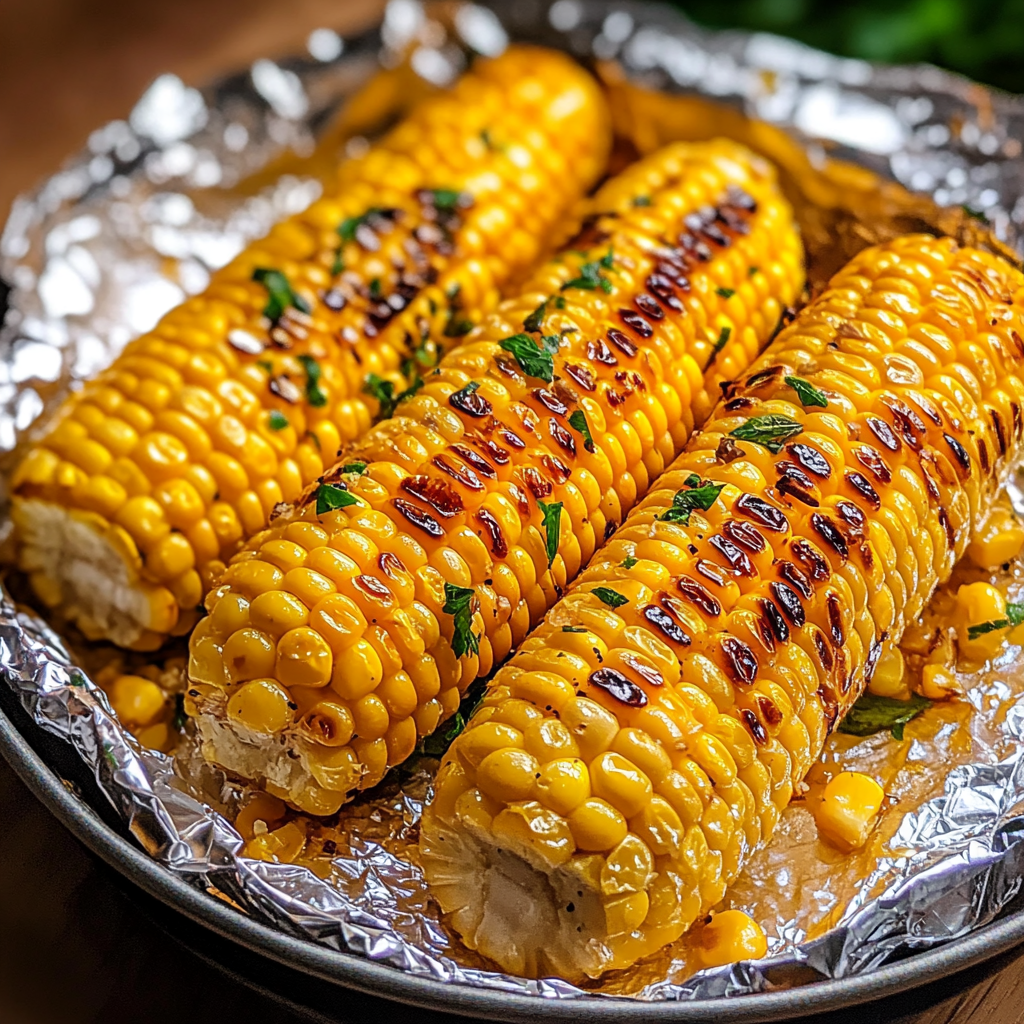
Grilled Corn on the Cob in Foil is the undisputed heavyweight champion of backyard barbecues, bringing that unmistakable sweet and smoky magic to your plate without the mess. There is something truly nostalgic about peeling back a warm layer of aluminum to reveal golden, glistening kernels that practically burst with flavor at the first bite. Whether you are a busy mom trying to get a healthy side on the table or a weekend grill master looking for a reliable crowd-pleaser, this recipe for Grilled Corn on the Cob in Foil is your new best friend. I love how the foil acts like a little steam chamber, locking in every drop of moisture so you never have to worry about tough or dried-out corn. It is the kind of effortless cooking that lets you focus on the conversation and the sunshine rather than hovering over a hot flame. Plus, since we are wrapping them up, the cleanup is practically nonexistent, which is a total win in my book.
What is Grilled Corn on the Cob in Foil?
This dish is a clever cooking method where fresh ears of corn are seasoned and tightly sealed in aluminum packets before hitting the grill. Unlike grilling corn directly in the husk or naked on the grates, the Grilled Corn on the Cob in Foil method uses indirect heat and steam to cook the kernels to perfection. The foil protects the delicate sugars in the corn from burning too quickly while allowing the butter and spices to meld deeply into every nook and cranny. It results in a tender, juicy texture that feels much more luxurious than standard boiled corn. It is a quintessential American side dish that bridges the gap between rustic outdoor cooking and refined, delicious flavor.
Reasons to Try Grilled Corn on the Cob in Foil
If you have ever wrestled with charred husks or silk sticking to your teeth, you will appreciate why the Grilled Corn on the Cob in Foil method is a game-changer. First, it is incredibly forgiving; the foil provides a safety net that prevents the corn from drying out if you get distracted by a neighbor or a thirsty toddler. Second, it is a meal-prep dream because you can season and wrap the ears hours before the party starts. Third, the flavor infusions are endless—the steam carries the scent of garlic, herbs, or pepper right into the heart of the cob. Lastly, it keeps the corn hot for a surprisingly long time after it leaves the grill, making it the perfect “set it and forget it” side for large gatherings.
Ingredients Needed to Make Grilled Corn on the Cob in Foil
- 6 ears of fresh corn (shucked and cleaned of all silk)
- 4 tablespoons of butter (make sure it is softened for easy spreading)
- ¼ teaspoon of salt (fine sea salt works beautifully here)
- ½ teaspoon of dried garlic powder (this is optional but highly recommended for a savory kick)
- ⅛ teaspoon of ground black pepper (optional, for a hint of warmth)
Instructions to Make Grilled Corn on the Cob in Foil – Step by Step
Step 1 Start by firing up your grill and preheating it to a steady 400°F. While the grates are getting hot, take your softened butter and place it in a small mixing bowl. Add your salt, garlic powder, and black pepper, then mash them together with a fork until you have a smooth, fragrant compound butter. This Step by Step preparation ensures that every inch of your corn gets an equal share of the seasoning.
Step 2 Lay out six squares of heavy-duty aluminum foil on your counter. Place one shucked ear of corn in the center of each square. Using a knife or a small spatula, rub about a teaspoon and a half of that gorgeous garlic butter over the kernels. As you follow this Step by Step guide, remember to rotate the cob so the butter coats all sides.
Step 3 Now it is time to wrap. Pull the sides of the foil up and over the corn, folding the edges down tightly to create a sealed packet. You want to trap all that steam inside! To be safe, especially if your foil is thin, you can wrap two ears together in a double layer. Following the process Step by Step like this prevents any butter from leaking out and causing grill flare-ups.
Step 4 Place your foil packets onto the preheated grill. Close the lid and let them cook for about 10 minutes. Use a pair of long-handled tongs to flip the packets over. This Step by Step flipping technique ensures the heat hits the corn evenly from all angles. Continue grilling for another 10 to 20 minutes depending on how tender you like your kernels.
Step 5 Once the time is up, carefully remove the packets from the heat. Let them sit for a minute or two before opening, as the steam inside is very hot. Peel back the foil, give the corn one last roll in the melted butter pooled at the bottom, and serve them up while they are still steaming and beautiful. Completing the recipe Step by Step ensures a perfect result every single time.
What to Serve with Grilled Corn on the Cob in Foil
This corn is a social butterfly—it gets along with almost everything on the menu! It is the natural companion to juicy grilled burgers or slow-cooked ribs. If you want to keep things light, serve it alongside a crisp cucumber salad or some grilled shrimp skewers. For a more “street food” vibe, you can top the finished corn with a squeeze of lime and a sprinkle of cotija cheese. Because it is so versatile, it works just as well at a fancy steak dinner as it does at a casual lakeside picnic.
Key Tips for Making Grilled Corn on the Cob in Foil
The secret to the best Grilled Corn on the Cob in Foil starts at the grocery store; look for husks that are bright green and slightly damp, which indicates the corn was recently picked. If you love a bit of char, you can open the foil packets for the last two minutes of grilling to let the flames kiss the kernels directly. Also, do not be afraid to experiment with your butter! Adding a little smoked paprika or chopped fresh parsley can take the flavor profile to a whole new level. Most importantly, use heavy-duty foil if you have it; it stands up much better to the high heat of the grill grates.
Storage and Reheating Tips Grilled Corn on the Cob in Foil
If you happen to have leftovers—though in my house, that is a rare miracle—you can store the cooled corn in an airtight container in the fridge for up to four days. To reheat, I recommend keeping them in their foil and popping them into a 350°F oven for about 10 minutes until warmed through. If you are in a rush, you can remove the foil and microwave the cob for 30 to 60 seconds. Leftover kernels are also amazing when sliced off the cob and tossed into a summer pasta salad or a zesty corn chowder the next day.
FAQs
Can I make this in the oven instead of a grill? Absolutely! Just place the foil packets on a baking sheet and roast them at 400°F for about 25 minutes. You will get that same tender, buttery result without needing to step outside.
Do I need to soak the corn first? Nope! Since we are removing the husks and using foil, there is no need to soak the ears. The butter and the natural moisture in the corn create all the steam you need.
What if my corn is already shucked? That is perfectly fine. Many grocery stores sell pre-shucked corn in packs. Just give them a quick rinse to remove any lingering silk, pat them dry, and proceed with the buttering and wrapping.
Final Thoughts
There is a reason Grilled Corn on the Cob in Foil remains a favorite across American dinner tables year after year. It is simple, soul-satisfying, and brings a touch of rustic charm to any meal without demanding hours of prep work. By following these easy steps, you are guaranteed a side dish that is juicy, perfectly seasoned, and incredibly easy to clean up. So, the next time you fire up the grill, make sure you have a few ears of corn and a roll of foil ready to go. Your family—and your taste buds—will definitely thank you for this smoky, buttery treat!
Print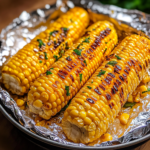
Grilled Corn on the Cob in Foil: The Ultimate Smoky Summer Side
- Prep Time: 10 minutes
- Cook Time: 20 minutes
- Total Time: 30 minutes
- Yield: Serves 6
- Category: Side Dish
- Method: Grilling
- Cuisine: American
- Diet: Vegetarian
Description
Grilled Corn on the Cob in Foil is a summer staple that brings sweet, smoky flavors to your backyard barbecues. This easy recipe wraps corn in foil, locking in moisture and ensuring each ear is juicy and tender. Perfectly seasoned with butter and optional spices, this dish is ideal for casual dinners or festive gatherings.
Ingredients
- 6 ears of corn (shucked)
- 4 tablespoons butter (softened)
- 1/4 teaspoon salt
- 1/2 teaspoon dried garlic powder (optional)
- 1/8 teaspoon ground black pepper (optional)
Instructions
1. Preheat your grill to 400°F.
2. In a small bowl, mix softened butter, salt, garlic powder, and black pepper until smooth.
3. Rub the butter mixture evenly on each ear of corn. Wrap two ears together in double layers of foil to create sealed packets.
4. Grill the packets for about 10 minutes, then flip and grill for another 10–20 minutes until corn is tender.
5. Carefully unwrap the packets and serve hot.
Notes
You can add herbs like parsley or cilantro for extra flavor.
For a smoky kick, sprinkle chili powder or smoked paprika before grilling.
Be careful when opening foil packets as hot steam will escape.
Nutrition
- Serving Size: 1 ear of corn
- Calories: 150
- Sugar: 6g
- Sodium: 180mg
- Fat: 9g
- Saturated Fat: 5g
- Unsaturated Fat: 4g
- Trans Fat: 0g
- Carbohydrates: 15g
- Fiber: 2g
- Protein: 3g
- Cholesterol: 15mg